Showing posts with label competition. Show all posts

Tuesday, January 29, 2013

Finally some pictures...

Fancy new dags to wear with an old hat
Even if they are crappy phone pictures of Himself!

These were taken in the Doubletree Hotel in Portland the Saturday of 12th Night.  They are clearly not the best of photos, I'd like to take some better ones eventually, but this lets me put up something at least.

You can tell from his happy smiling face that he really likes his new houp.  I'm proud of the fact that I got his houppelande out of 8.5 yards.  Yes, that is a floor-length, giant, drapey-sleeved houppelande out of 8½ yards.

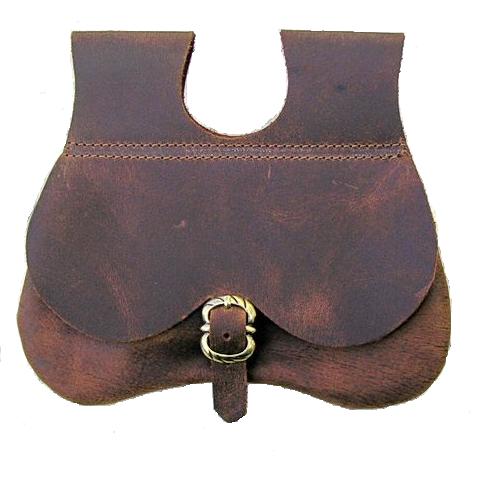
Showing off the pouch he made to go with it,
and the tenner which was a wedding present.
How you ask?  I took the lessons taught us by rectilinear construction and turned them on their sides!  Ignoring the sleeves, which took up just under three yards, the body panels are made of "gores" cut just like making inserts for skirts on T-tunics.

I measured his shoulder to hem and cut a full width panel of the fabric, a light weight wool gifted to me years ago when I thought I would make a Cranach gown out of it.  (I was young, I didn't realize it was too light weight when I fell in love with the color)  Luckily I was lazy, and my best friend didn't mind me re-purposing her gift into something for my Hubby.

First Crappy MS Paint Diagram
Back to the cutting.  The body is made from three full width panels of fabric, the first measuring from shoulder to floor with hem allowance, the second being back panels and a couple inches longer so they drag the floor when he walks (not a train, but just long enough to be imposing), and the third full width panel is halfway between the length of the two.  All three panels were folded in half, and cut into eight wedges using the cutting layout show in this crappy MS Paint diagram, not to scale.  The short end of the wedge is really all that mattered, his shoulder seam length was about six inches long, so each short end was an inch with seam allowance.  The other side of the wedge was whatever it worked out to be.

Second Crappy MS Paint Diagram
The pieces were then arranged into a circular shape, the shortest four in center front, the longest four in the center back and the middle four arranged along the sides, two wedges for each quarter of the body.
The second crappy MS Paint diagram shows the layout of one of the front panels, totally not to scale.

Doing the body panels this way meant I had practically no scrap left over from cutting.  This cutting method is great on a solid color houp because you can barely see the seam lines, and sewing straight to bias forces the fabric into draped lines at the floor.
Crappy MS Paint Sleeve Diagram

The sleeves are done in a strange fashion that was really hard for me to wrap my brain around.  Himself's knight's lady is a Laurel, and a good friend of his.  She's done a few houppelandes and when I asked her advice she said to make it like an angel wing sleeve, but to put the S-curve into the straight part of the half oval instead of the curved part.  This causes the seam to fall straight down the back, and the curved edge to fall back from the wrist, more or less keeping it completely out of anything you reach for.  The dags get cut into that curved edge, and I used a template made from a 3x5 card to trace them out.  I intended to do a gold leafed pattern on the sleeve of his 12th Night Houp, but I ran out of time/brains to figure it out.

A repro poster site
I love the thriftiness of this layout for the body.  I'm already planning to make him more houppelandes eventually, since I've decided this year is about making him new garb.  I'm only allowing myself to start one new project for me, I'm trying to make everything else for him or for our roommate.  I'd like to do a shorter length houp with rectangular pleated-in, gold embellished sleeves like the cup bearer in the January image of Tres Riches on the far left.  This is one of the main inspirations for the pouch he made, and we've developed some theories about pouches that should make for an interesting A&S entry.  My tenure as the Baronial A&S Champion is coming to a close, he's planning to enter the pouch into the competition.

Hope this helps save some people a little fabric when making a houppelande.  I don't know how well my theory would work with a brocade, but for a solid color wool, I like the way it works.

Monday, December 10, 2012

Just a bit of a distraction....

The style Himself likes
The Boy is rather bored lately, what with being unemployed and being at home all the time.  While this has manifested in tasty tasty noms for dinner, it also means we've been looking for projects for himself to work on.  When visiting the Tandy Leather here in town to look for materials for himself to make a kidney pouch, I found some GORGEOUS red leather that had to come home with me to make Roman shoes.

The trouble is, I don't know exactly what style it is that I want to make.  I've never made shoes before, so I want something relatively easy to create for my first endeavor.  I've been collecting images for a while, and I thought I'd put them up here to see if anyone had an opinion on which I should make.


5th century womens shoes found in Egypt
Photo by Mary Harrsch,
located in the Getty
I know I want Roman shoes, something closed toed and flat, but I can't decide between the simpler slipper style which I think would be easier for a first try, or the gorgeous cut work slippers that I've been lusting over for a while.

 If I choose the simple slipper style I'd want to figure out how to do the gold embossing found on both of these examples.
Shoes found at the Antonine Wall

The Low Ham Boot
I'm also considering doing a simple slipper style for the first pair, but doing a bit of a cut work pattern on them like the pair on the left without the ties to lace it closed.  I like the patterns and texture created by the cut work.

Sara Kerr's pattern mockup
I've found several tutorials and descriptions on how to make turn shoes, and some ideas on how to pattern shoes with a duct tape "cast" of your foot.  I'm working on getting more research together, and looking for opinions on what style to do before starting, but I do want to get started sometime in the next week and a half.  I'm daydreaming about entering a Roman outfit in the 12th night costuming competition.

I'm thinking about heading up to the Pendleton outlet before Jule next weekend to see if I can find some wool gauze to make "winter Romans"  Since most of my Roman gear was made in Texas, it's mostly made of cotton or a linen/cotton blend.  I'd like to make an outfit for that competition, but it's about a month away and I haven't made any of what I would like to enter.  On the positive side, it's Roman, so it's not that hard to make quickly.  But the wool would be more historically accurate, and it would be nice to have something that was more correct than what I'm wearing now, and it would be great to have something to wear in cooler weather that was my persona.

Sunday, November 4, 2012

Realized I never posted pics of my Housebook dress....

Even though the dress was made nearly a year ago... Oops?

Outdoor photos are from the first wearing at Stargate Yule down in Houston; the indoor photos are from Midwinter's Feast in Adiantum (Eugene).  Those last photos of the back of the dress are me being made the Barony's A&S Champion.  It's hard to see in the photos just how long the train is, but as I've got the dress kilted up in most of them to walk, you can see where the extra six inches past my feet is all hiked up.

I'm still not stuck on the neckline, and have tweaked it some, but need to do more with it.  If we're still in the area in January, maybe I'll tweak it some more for An Tir's 12th night.

Also: Awesome Red Hat!

Friday, May 11, 2012

I know I promised this months ago...

But here it finally is,

Achieving Livia's Look:
Recreating an Ancient Roman Hairstyle


This Style in History:

Roman hairdressing has shown an amazing variety in styles.  Tall halos of curls, elaborate braided confections, and simple matronly buns, Roman women wore the hair in a vast array of personal styles.  One iconic style is that of Empress Livia.

This bust of Empress Livia resides in the Ny Carlsberg Glyptotek (fig 1-5).  The museum has dated this particular piece of marble to 4 CE or later, and believes it to be a copy of an original made ca. 27-23 BCE.

Livia’s style is deceptively simple.  She wears her hair with a center section combed forward into a “nodus,” a feature she is known for, the rest pulled back from the face along the sides in loose rolls to meet in the back with a complex bun wrapped with braids.  The method for securing such a style is unknown, but there are theories.

I believe this bust to be a representation of a casual hairstyle Livia wore.  This style is shown on many other busts, in a variety of materials, most depict Livia, but some show other women have copied her style.

Being an empress, Livia was the model for a lot of sculpture.  Though Romans tended toward an eternally young depiction of people (statues made of Livia when she was 60 look much the same as when she was 20) there is certain realism to them (Bartman 19).  There are examples of Livia shown as an allegory, most frequently as the goddess Ceres, with a floral crown and holding a cornucopia, (fig. 6) or in the style of Pudicitia, where she is covered modestly by a veil (fig. 7).  In some of these styles she wears a similar hairstyle to the featured one, and sometimes her hair is simply parted down the center and flows to either side in waves.  In every allegorical image, she wears something on her hair, a veil, a diadem or a wreath of flowers.  This leads me to believe that her uncovered style is not allegorical.

Potential Historical Methods:

While no one knows for certain how these hairstyles were created, experimental archeology gives us some clues as to the methods necessary for securing them.  There are three methods for fastening styles that are possible with Roman hairstyling, “gluing,” pinning, or sewing.  Along with the arguments for and against each of these methods, this section will include descriptions of other tools a period hairstylist would use, and a brief discussion of who these historical hairstylists would be.

Gluing:
A method for securing hairstyles that involves coating the hair, either part or all of the strand, with a substance that sticks the strands together.  Beeswax and resins are capable of being documented to the first century CE; gel made from soaking or boiling flaxseed is theoretically possible, and water soluble gum arabic would have been available, though perhaps expensive since it would need to be imported.

It is possible that the entirety of the style was held together with “glue,” but I find it extremely unlikely.  This style, even carved in heavy marble, shows a lightness to the hair that wouldn’t have been possible if all the hair was coated in product.  Also, seen easier in the plaster cast of the bust of Livia, (Fig. 8) fine, wispy hairs along the hairline are present.  That a sculptor found them necessary to carve into the busts instead of eliminating them for ease of sculpting, seems to prove their existence.  These wispy hairs wouldn’t be present if all the hair were slicked back with styling product.

Romans who could afford it bathed daily, including women and children.  Baths were deep enough to be fully immersed, suggesting that the hair was soaked along with the body.  If so, a bath would destroy a hairstyle created entirely by water soluble adhesives.  The frequency of bathing would suggest the need for a more easily removable fastener.

Pinning:
Believed by some to be the most common way of securing a Roman hairstyle, this method uses pins to hold the hair at specific points.  These pins would be straight, single pronged pins, like sewing pins or hair sticks, as U-pins were not created before the 18th century (Stephens 120).  A profusion of decorative hair sticks exist in archeological record.  Made of ivory, bone, wood, jet, gold and other materials, they often feature carved heads or elaborate miniature sculptures at the top (Stephens 112).  They would be easy to insert into hairstyles, and be easy enough to remove prior to a daily bath.

However, the lack of their presence in art makes it more unlikely that these hair “pins” were used to create these styles.  Extremely few portrait busts show large hair sticks, and most of those only show one, insufficient to be the sole means of support (Stephens 117, 119) (Bartman 12).  If the styles were constructed using smaller pins, it would require numerous smaller straight pins to secure the style.  These small pins could possibly be hidden from sight, but I’ve found no report of a large number of small pins in grave finds.

Sewing:
Sewing hair as a method of securing a style requires a large needle, and sufficient length of thread to stitch through elements of the style, to prevent portions of the style from coming loose.  Thread was most likely wool, as it is the most common fiber in Roman clothing, and Juvenal mentions a slave working wool while the mistress’s hair was being styled (Stephens 124).  By using a thread of similar color to a lady’s hair, the thread becomes almost invisible, and more closely resembles period artwork.

The use of the Latin word acus causes some confusion amongst translators.  It appears to most often be translated as pin when describing hair arranging, but when used in conjunction with sewing terms, it means sewing needle.  Janet Stephens would argue that this word should be used for needle in both cases, specifically citing Sextus Pompeius Festus, whose Glossaria Latina has an entry on hairdressing and needles that states: “ACUS dicitur, qua sarcinatrix vel etiam ornatrix utitur” (that which the cloth-mender as well as the hairdresser uses is called a needle.)  That the same type of tool was used for both sewing of cloth and sewing of hair explains the difference in needle sizes in Ancient finds.  The size of needles believed to be used for hair sewing are larger than would be used for sewing cloth, commonly ranging from 10-15 cm, and being 0.5-1 cm in diameter, and have blunted ends.  Roman needles this large are usually made from bone or ivory, though there have been finds of gold and glass (Stephens 113).

In addition to finds of large needles, there is a frieze on a tomb that depicts objects connected women’s work, and a needle is depicted with a cosmetic spatula on the right side.  The spindle for creating thread is placed at the far left, with a variety of other elements between them; a clear separation of the two subjects.  There is also the “beauty case of Cumae” that contains jewelry, a mirror, several cosmetics related items, and a complete set of hairdressing tools, a comb, bodkin, spindle and needle (Stephens 122-123).

Ornatrices:
Roman hairstyles can be complex, and often require at least one other person to arrange the hair, if not several.  Taking down a style is also complicated; if sewn, one must separate the wool thread from the lady’s hair, cutting only that thread.  This requires the presence of an ornatrix. 

Many Roman ladies of wealth had a slave, or several, just for arranging their hair.  This hairdressing slave is known as an ornatrix.  Images of hairdressing performed by a servant are seen in tomb carvings (Bartman 4).  There are several instances in Roman literature of orantrices, and they are frequently mentioned as the recipient of abuse from their mistresses for pulling hair or making a mistake while styling it.  Juvenal’s Satire 6 features two slaves actively working on their mistress’s hair, while a third who has retired from work due to age sits and spins thread while giving advice.  Her skill is respected and she was once an expert of styling (Stephens 124).

Other Tools:
Aside from the needle and thread, arranging the hair of a Roman lady would require a few other tools.  A comb was necessary to detangle and smooth the hair, a hair bodkin for parting sections, a curling iron for later styles, and a mirror for the lady to view all angles of the style (Stephens 123).

How I Did It:

Start with clean(ish), combed hair.  This style works best with hair of near waist length or more.  Begin the style by creating the center section, parting the hair from the back of the scalp to approximately the center of each eye.  Comb this section forward, and secure the remaining side hair for the time being.  This is easily done with a hair bodkin. 

As seen in the images of the Lady from Cerveteri, in the Ny Carlsberg Glyptotek, the center section is parted in a downward point near the front of the hair. (Fig 9)  I believe this part indicates a place where the hair is bound together, creating a secure spot to anchor later steps of the style to.  Bind off the section of hair, either with a needle and thread, or, if using modern elements, with a small hair elastic.  Pull the bound section and the rest of the center section forward and bind them together at nose length.  Braid this section below the binding down to the tips.  The tips can be bound with thread, dipped in water to temporarily stick them together (Stephens 123), or modernly, wipe gel on them to bind them together.  Sew the two bindings together to create a loop at the center forehead (called a nodus), and stitch the braid down the center section.  Then release the rest of the hair.

Part the rest of the hair down the center below the wedge.  Use large sections to create French twists down both sides of the head.  Some busts show twists all the way to the bun in the back; some only use part of the hair on the side, as clearly seen on the Bust of Livia in the British Museum. (Fig. 10)  Once these twists rolled to the nape of the neck, bind them into a pony tail.  Separate out about a third of the hair from each twist, and create a braid on either side of the head.  These two braids will wrap around the finished bun.

Take the remaining unbraided section of hair and pull the tail through the gap made by the center section of the hair, leaving a loop of hair.  Stick a hair bodkin through this loop to prevent it from being pulled through the gap.  Smooth out the tail below the loop.  Pull that tail back through the gap, creating a second loop below the first, inserting another bodkin to keep the loop from pulling through.  The two braids should emerge from either side of this loop.  What hair remains of the unbraided tail can be wet with water and wrapped around the bun.  Secure this bun with large stitches through it.  Wrap the braids around the bun, securing the braids with stitches.  The style is complete.

A few notes on constructing this style.

When creating the central section, start from further back on the head than you expect.  Most of the images show that the point of the central section is covered by the bun.  While the most frequent location for this large bun is the nape of the neck, the Late Republican Woman in the NY Met shows a very high bun, perched at the back of her head. (Fig. 11)  Her bun is also smaller than most of the examples, and rounder rather than the flatter versions that are more common.

There are a few other alternatives within the style that are exhibited by various busts.  The bust of Livia in the Ny Carlsberg Glyptotek doesn’t feature a central braid, but smooth hair. (Fig. 1)  Either all the hair is rolled into the nodus, or the tail of hair is some how smoothed down the central section of hair.  Also there is an interesting example of the nodus itself being braided in a herringbone style. (Fig. 12)  Most of busts of Livia herself feature a nodus that is full and circular, though when her nodus is paired with a central braid, it is often more horizontal, as can be seen in the bust of Livia Drusilla that resides in The Archaeological Museum in Selçuk, (Fig. 13) or in the bust of Livia from the Crypta Balbi section of the National Museum of Rome, (Fig. 14) where the nodus has broken off, but the shape can be determined by the remaining outline.

The less rounded nodus is also a common feature for women copying the Empress’ look.  Images of the Late Republican Woman, (Fig. 11) present a fairly flat nodus, with the top layer clearly shown.  The Roman Lady from Cerveteri, (Fig. 9), displays a nodus with barely any height, all the hair is drawn together on the top with smooth curves.

A third variation can be found with the side rolls.  In a few examples the side rolls are smooth, but still have volume, instead of sectioned, as in the Late Republican Woman’s hairstyle. (Fig 11)  Visible on the bust of Livia carved from basalt, in the Louvre, (Fig. 15) are large waves that undulate down the hairline on either side of the head.  The carving indicates that the hair isn’t rolled, but loose pulled toward the back to maintain the waves.

To Wrap it Up:

This elegant style is hardly simple, but with the help of a handmaid, friend or servant, who is a capable hairdresser, and a few simple tools, the nodus style of Empress Livia can be achieved.  There are a variety of small changes that can be made to personalize the style, and it is a beautiful way to finish an early Roman outfit.
Fig. 1
Fig. 2

Fig. 3

Fig. 5
Fig. 4

Fig. 7
Fig. 6


Fig. 8
Fig. 10
Fig. 9


Fig. 11
Fig. 12


Fig. 13
Fig. 14


Fig. 15


Bibliography

Bartman, Elizabeth. "Hair and the Artifice of Roman Female Adornment." American Journal of Archaeology. 105.1 (2001): 1-25. Print.

Basalt Livia, (fig. 15) Louvre, Photo by Joe Geranio.  http://www.flickr.com/photos/julio-claudians/5826158704/  Jun 12, 2011.  Dec 28, 2011

Bust of Livia, Copenhagen 1444 (fig. 1-5). Ny Carlsberg Glyptotek.  Photos by Roger Ulrich.  http://www.flickr.com/photos/roger_ulrich/5401662363/  Jan 30, 2011.  Dec 28, 2011.

Bust of Livia, (fig. 10). British Museum, Photo by Roger Ulrich.  http://www.flickr.com/photos/roger_ulrich/5083966797/  Oct 15, 2010.  Dec 28, 2011.

Late Republican Woman, (fig. 11) NY Met, Photo by Roger Ulrich.  http://www.flickr.com/photos/roger_ulrich/4349761771/  Feb 11, 2010.  Dec 28, 2011

Livia, (fig. 14), Museo Crypta Balbi, Rome.  Photo by Rien Bongers.  http://www.flickr.com/photos/antiekpubliek/4069196309  Nov 2, 2009.  Dec 28, 2011.

Livia as Ceres, (fig. 6) Louvre, Photo by Joe Geranio.  http://www.flickr.com/photos/julio-claudians/281634307/  Oct 28, 2006.  Jan 11, 2012.

Livia Drusilla, (fig. 13) Selçuk Museum, Ephesus , Photo by Christoph Houbrects.  http://www.flickr.com/photos/crisdefeu/3936828412/  Sep 20, 2009.  Dec 28, 2011

Liva from the Villa of the Mysteries, (fig. 7)  Photo by Joe Geranio.  http://www.flickr.com/photos/julio-claudians/3534732349/  May 15, 2009.  Jan 11, 2012.

Livia Tunisia, (fig. 12). museum unknown, Photo by Joe Geranio.  http://www.flickr.com/photos/julio-claudians/2422218499/  Apr 18, 2008

Plaster Cast of Bust of Livia, Copenhagen 1444 (fig. 8) Photo by William Storage.  http://www.flickr.com/photos/bstorage/4045212257/  Oct 25, 2009.  Dec 28, 2011

Roman Lady from Cerveteri, (fig. 9) Ny Carlsberg Glyptotek, Photo by Roger Ulrich.  http://www.flickr.com/photos/roger_ulrich/5102631473/  Oct 21, 2010

Stephens, Janet. "Ancient Roman hairdressing: on (hair)pins and needles." Journal of Roman Archeology. 21. (2008): 111-126. Print.

Saturday, January 21, 2012

Housebook Documentation....

Patterned after the Housebook Master:
A 1480’s German Dress


Lady Petronia Casta
mka Lorien Haigh

This Dress in History

This dress is based off several images from the Medieval Housebook, an impressive manuscript started in 1475 in southern Germany.  This collection of images, mostly pen and ink drawings, illustrating life in and around a princely court, are the majority of the works attributed to the Housebook Master (Getty).  His work occasionally features young women wearing an unusual dress that fascinated me.

The dress (kleid) features a very tightly fitted bodice with an odd pleated section on the stomach and center back, an extremely low cut neckline that shows off the undergarment (hemd) (Fig. 1), with lacing that crosses over the collarbone often from a decorative lacing jewelry piece sewn onto the dress, and a full, overly long skirt that pools on the ground, and trails behind some women in a train. (Fig. 2)

The Housebook Master isn’t the only artist to have depicted this style of dress, and there are a few variations in the style.  Some images show the sleeves to be widely cut, and consistent in width from bicep to wrist or longer. (Fig. 3)  The armscye of this sleeve is deeply cut on the back of the dress, causing the sleeve to cover the shoulder blade. (Fig. 4)  The alternative version of the sleeve is three quarter length, and tightly fitted from the bicep to the middle of the forearm.  It is usually shown with a cut away on the sleeve from hem to just above the elbow.  The sleeve is then laced across the opening and the hemd’s sleeve. (Fig. 5)

The shape of the neckline varies a little from dress to dress, though the majority of them are a slightly rounded V-shape from the collarbone.  There are a few higher, more rounded necklines, (Fig. 6) and some have decorative collars around the back or decorative bands all the way around the neckline. (Fig. 3)  The dress is frequently worn with a belt, either to hold pouches, (Fig. 4) or used to hike up the extra long skirts for walking. (Fig. 2)  Occasionally, the lifted skirts show off another garment below the outer dress, either a petticoat, or likely, and under dress that is fitted throughout the body.  In one example, the under dress is checky patterned. (Fig. 2)

The hemd is usually only visible at the front of the neckline, but an couple images of peasant women in their hemds show a banded neckline, pleated only at the center front (presumably also the center back) and full long sleeves, loose or gathered into a band at mid-forearm (Figs. 7&8).  The dress is most frequently worn with poulaines, shoes with pointed toes that can sometimes be extremely long. (Figs. 1, 2, 5, 6&7)

There is also some variety to the styles of headdress worn with this kleid, though they almost always worn over a pair of braids, drawn up over the head in front of the ears. (Figs. 1-5&7)  (There are occasions of loose hair, but these are often scenes of saints, young women, or extremely casual.)  With these braids is worn most commonly either a fringed cap (Figs. 1&2) (seen most often in conjunction with the large loose sleeves), or a wulsthaube, a peculiar German headdress of white or patterned fabric drawn tight over a bump along the top back of the woman’s head (Figs. 5&6).  A narrow ribbon around the head that supports a fringe (called a gefranse) that drapes over the back of the neck was sometimes worn alone, (Fig 9) with a floral wreath, (Fig. 10) or some combination of other hats.  A cap and neck fringe are in at least one image, (Fig. 4) the wulsthaube and fringe are pretty common for this style, (Figs. 5&9) and occasionally there are unique hats seen only once in imagery. (Fig. 11)

Historical Methods

I have found very little information on how this particular garment would have been constructed in period.  Much of the construction information available is for either earlier or later garments and from other geographical regions, but from this information can be extrapolated to give an idea on how this dress was constructed.

Natural fibers are the only ones that existed in the 15th century.  Wool and Linen were the most common fibers in southern German at the time, though some silk was available, and there are other varieties of bast fibers that would have been known.  Very little linen survives from the medieval period, as plant fibers decompose more quickly than protein fibers.  Wool fibers have a certain amount of stretch to them, and this would help produce a smooth fitted body, but a fabric with less give would be beneficial for the supportive nature of the bodice, like linen of moderate weight.  The images of this dress show the fabric puddling in thick folds on the ground.  This indicates a heavy, denser fabric, likely mid- to heavy-weight wool.  The images from the Housebook don’t have much detail of the texture of the fabric, and most of the outer gowns have no pattern; the few images in color show a solid color garment. (Fig. 12)

Linen would be the most likely material for the hemd, as such a garment would need to hold up to both body dirt and oils and repeated washing.  Colored images present the hemd as mostly white, though several are embellished with bands of other colors, and embroidery or beadwork.

Hand sewing was the only option for constructing garments during this period.  Garments have been found in London, a little earlier than the Housebook Master was working, where the stitching has completely decomposed, leaving the impression of seam lines, indicating the predominate sewing thread of the period was linen (Crowfoot, Ritchard, and Staniland 151).  Techniques for sewing wool from Hedby in northern Germany show a few varieties in joining methods.  The raw edges of the garment would be turned under once and hem stitched before joining pieces together with an overcast stitch, or the seam would be sewn first with a running stitch, and the edges overcast together afterwards (Jones).

The pleating at center front and back is cause for confusion.  Knife pleats and box pleats are the most common forms of pleating in garments depicted in historical costume, but create a fairly flat pleat.  Cartridge pleats and rolled pleats are less frequent and are used to create volume in the pleat.  Cartridge pleats are intended to gather a large amount of fabric into a small space without creating a bulky seam, and makes the fabric spring away from the body.  Rolled pleats are rare, and there is very little evidence that it was used before Victorian times, but it creates long tubular pleats and seems to be the method used to create the skirts in some Renaissance paintings, specifically Lucas Cranach’s 16th century German gowns (Leed).  The dress appears to close center front, and a few images show center front lacing hiding behind the pleats.

What I Did

I decided to make this gown a little less than three weeks out from the event it debuted at, though I’d been considering the dress for over half a year before.  I’ve used historical materials and techniques where I could, given the time crunch and a lack of available funds.

I was given a five-yard piece of wool coating as a thank you gift from friends.  It is thick enough to create the beautiful folds when draped.  It came to my possession as a chai-grey color, and, being in love with the teal color of the woman’s dress in Gotha Lovers (Fig. 12), I decided to dye the fabric.  I began with some RIT dye, but it was insufficient to color the fabric to any real depth, so I purchased some Jacquard Acid dye.  Neither of these is period, but the depth of color was my goal, and I have very little knowledge of period dyes.  In the short amount of time I had, I chose the dyeing technique I had some familiarity with.

To line the bodice and sleeves, I used some medium weight blue linen that I had for another project.  The dress is sewn with modern polyester thread for several reasons, but primary was cost and color, I couldn’t find a good color match in silk thread to justify it costing more.  Lacing cord is supposed to be black silk I bartered for, but the thread has gone walkabout since the dress’s debut, and has been replaced (hopefully temporarily) by cotton embroidery floss.  With no skill in casting jewelry, I purchased a modern necklace clasp and used it to create my lacing loops.  The hemd is made from light weight white linen.

I decided to pattern myself for this garment, mostly to see if I could.  I believe that in period at least one other person would be doing the patterning, and it would have made it easier, but my work schedule made meeting someone else difficult.  Patterning the sleeves was an impressive bit of torture.  I went through over a dozen incarnations of the pattern before settling on the one I have now, and I’m not entirely convinced its right.  The technique is based off that of the Grande Assiette, where the armscye is cut deep in back, and has a gore set into the back seam to create the large circumference necessary without adding bulk to the upper arm of the sleeve.  The sleeve is patterned with the seam running up the center back of the arm, as is correct for most period garments.  The elbow opening follows the seam, but is asymmetric, as the sleeve is angled to reduce bunching in the elbow.  The eyelets on the sleeve opening are done by hand, though they are bound with polyester thread.  The cord for lacing is made by hand by pulling a chain stitch tight, though I didn’t use a crochet hook.

The deep neckline of the dress is rounded, which was uncommon, but necessary because I am not shaped like the small women of the time.  The dress has been modified since the first wearing to open the neckline wider, since it seemed too narrow when first patterned.  The bodice has fairly straightforward seams; waist seam at natural waist or even a little below, side seams run vertically on the sides, center back seam.  The only unusual seam was the shoulder seams, which all appear to be to the back of the shoulder line.  I chose to close the dress with hooks and eyes that run down the center front, which is boned with a piece of plastic cable tie.  I believe the dress in period was either laced closed, or had hooks and eyes, but cannot document the hooks.  I also cannot prove there was boning in the dress, but my large bust requires more support.

I only had enough fabric left after cutting out the bodice and sleeves to make two panels of skirt.  I chose to cut a back panel and two fronts from this fabric.  The pleated portion of the skirt is cut in one with the smooth sides.  I carefully measured the width I needed for the pleats, measured down the necessary height difference of the pleats, added the width I needed for the smooth sections of the skirt, and drew a diagonal line from the end of the waist to the length of the hem, giving the skirt panels a tiny amount of flare.  The small triangular wedge that was left was flipped upside down to create a narrow gore to add just a tiny bit more flare at the hem.  I purposefully cut the skirt about six inches too long in the front, and twelve to sixteen inches long in the back to create not only the train, but also the fabric puddling on the floor when the skirts are unbelted.

For the pleating, I choose to use six rolled pleats each for the back and the front.  Most of the images showed six to ten pleats across the front.  I had seen the results of others’ cartridge pleating, and decided the pleats were too narrow and too many to be the best method for my pleats.  I specifically choose to sew my pleated portion to the bodice of the dress by leaving the bodice whole underneath it.  In every version I’d read about online, the seamstress had chosen to cut out the portion of the bodice where the pleating was, and inset the pleated panel.  Doing that perplexed me, and one seamstress who had done it mentioned trouble with the pleats pulling apart under the strain of being such a tight fitted garment.  By leaving the fabric whole as a background to sew the pleats to, most of the strain is off the pleats.  My fabric tends to have more stretch to it than I want.

For the hemd, I drew up a cutting diagram and made the whole garment in about 12 hours.  The shape is based entirely off the image of the peasant woman with sickle and shield. (Fig. 7)  The center front and center back are gathered, and the whole neckline edge is bound.  The armscyes are curved, but the sleeve is cut as a rectangle with no sleevehead.  I cut the side seams at an angle, similar to the skirt panels, and inserted the resulting triangles as gores on the side seams to increase the width of the fabric.  When I finished, I discovered that I hadn’t allowed quite enough room in the armscye, and the fit was too tight, so I added two small gussets to the armpits for more room.

With this dress I wear my fringed red hat, until I have time to make myself a wulsthaube.  I wear cheap pointed toe shoes, because proper poulaines are expensive, and a belt to hike up my skirts so I can walk and dance.  I’m looking forward to making a gefranse to wear over my hair on warmer days, and  I hope to create something checky to wear beneath this dress, but need to do more research on whether that is a full under dress or simply a petticoat.
Fig. 1

Fig. 2


Fig. 3

Fig. 4


Fig. 5

Fig. 6


Fig. 7
Fig. 8


Fig. 10
Fig. 9


Fig. 11

Fig. 12


Bibliography


Crowfoot, Elisabeth, Frances Ritchard, and Kay Staniland.  Textiles and Clothing, c.1150-c.1450.  London: Museum of London Publishing, 1992.  eBook.  14 Jan 2012.

Gotha Lovers(Fig. 12)  Master of the Housebook.  c. 1484. Schlossmuseum.  Freidenstein, Germany.  Wikipedia Commons.  20 Jan 2010.  <http://commons.wikimedia.org/>.  <http://www.gluckliche-eme.com/masterofthehousebook.htm>.  14 Mar 2011.

Jones, Heather Rose.  "Archaeological Sewing."  Heather Rose Jones.  29 Feb 2004.  Web.  14 Jan 2012. 

Lady with Letter Coat of Arms. (Fig. 1)  Master of the Housebook.  c. 1475/1500.  National Art Collections Dresden. Dresden, Germany. Bildindex der Kunst und Architektur. 19 Jan. 2010, <http://www.bildindex.de/>.  <http://www.gluckliche-eme.com/masterofthehousebook.htm>.  14 Mar 2011

Lady with Radish Coat of Arms. (Fig. 2)  Master of the Housebook.  c. 1475/1500.  National Art Collections Dresden. Dresden, Germany. Bildindex der Kunst und Architektur. 19 Jan. 2010, <http://www.bildindex.de/>.  <http://www.gluckliche-eme.com/masterofthehousebook.htm>.  14 Mar 2011.

Leed, Drea.  "Period Pleats."  Elizabethan Costuming Page.  N.p., n.d.  Web.  <http://www.elizabethancostume.net/pleats/>.  14 Jan 2012.

Lovers on Horseback(Fig. 11)  Attributed to Master bxg, active c. 1470-1490.  <http://www.gluckliche-eme.com/15thcentury.htm>.  14 Mar 2011

Lovers with a Falcon(Fig. 10)  Master of the Housebook.  c. 1480. National Art Collections Dresden. Dresden, Germany. Bildindex der Kunst und Architektur. 19 Jan. 2010, <http://www.bildindex.de/>.  <http://www.gluckliche-eme.com/masterofthehousebook.htm>.  14 Mar 2011

"Master of the Housebook (Getty Museum)."  The Getty.  The Getty, n.d.  Web.  <http://www.getty.edu/art/gettyguide/artMakerDetails?maker=17890>.  11 Jan 2012.

Peasant woman with sickle and shield.  (Fig. 7)  Livelier than Life- The Master of the Amsterdam Cabinet or the Housebook Master. JP Filedt Kok. Amsterdam 1985.  <http://myra.hem.nu/costume/Documentation/Artist/HousebookMaster.htm>.  12 Nov 2011

Playing Cards(Fig. 4)  Attributed to Master bxg, active c. 1470-1490.  <http://www.gluckliche-eme.com/15thcentury.htm>.  12 Jan 2012

Standing Couple(Fig. 5)  Master of the Housebook.  c. 1480. Staatliche Museen. Berlin, Germany. Web Gallery of Art. 20 Jan 2010. <http://www.wga.hu/>.  <http://www.gluckliche-eme.com/masterofthehousebook.htm>.  12 Jan 2012

St Barbara and St Catherine(Fig. 3)  Master of the Housebook.  c. 1485/1490.  Rijksmuseum.  Amsterdam, Netherlands.  Web Gallery of Art. 20 Jan 2010. <http://www.wga.hu/>.  <http://www.gluckliche-eme.com/masterofthehousebook.htm>.  19 Nov 2011

Woman with Two Children and a Blank Shield(Fig. 8)  Master of the Housebook.  c. 1475/1500. Museum of Fine Arts, Boston. Boston, Massachusetts. 20 Jan 2010. <http://www.mfa.org/>.  <http://www.gluckliche-eme.com/masterofthehousebook.htm>.  12 Jan 2012

Young Couple(Fig. 6)  Master of the Housebook.  c. 1480. UniversitĂ€tsbibliothek. Erlangen, Germany. Bildindex der Kunst und Architektur. 19 Jan 2010, <http://www.bildindex.de/>.  <http://www.gluckliche-eme.com/masterofthehousebook.htm>.  19 Nov 2011

Young man and two girl  (Fig. 9) Livelier than Life- The Master of the Amsterdam Cabinet or the Housebook Master. JP Filedt Kok. Amsteram 1985.  <http://myra.hem.nu/costume/Documentation/Artist/HousebookMaster.htm>.  12 Jan 2012